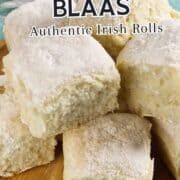
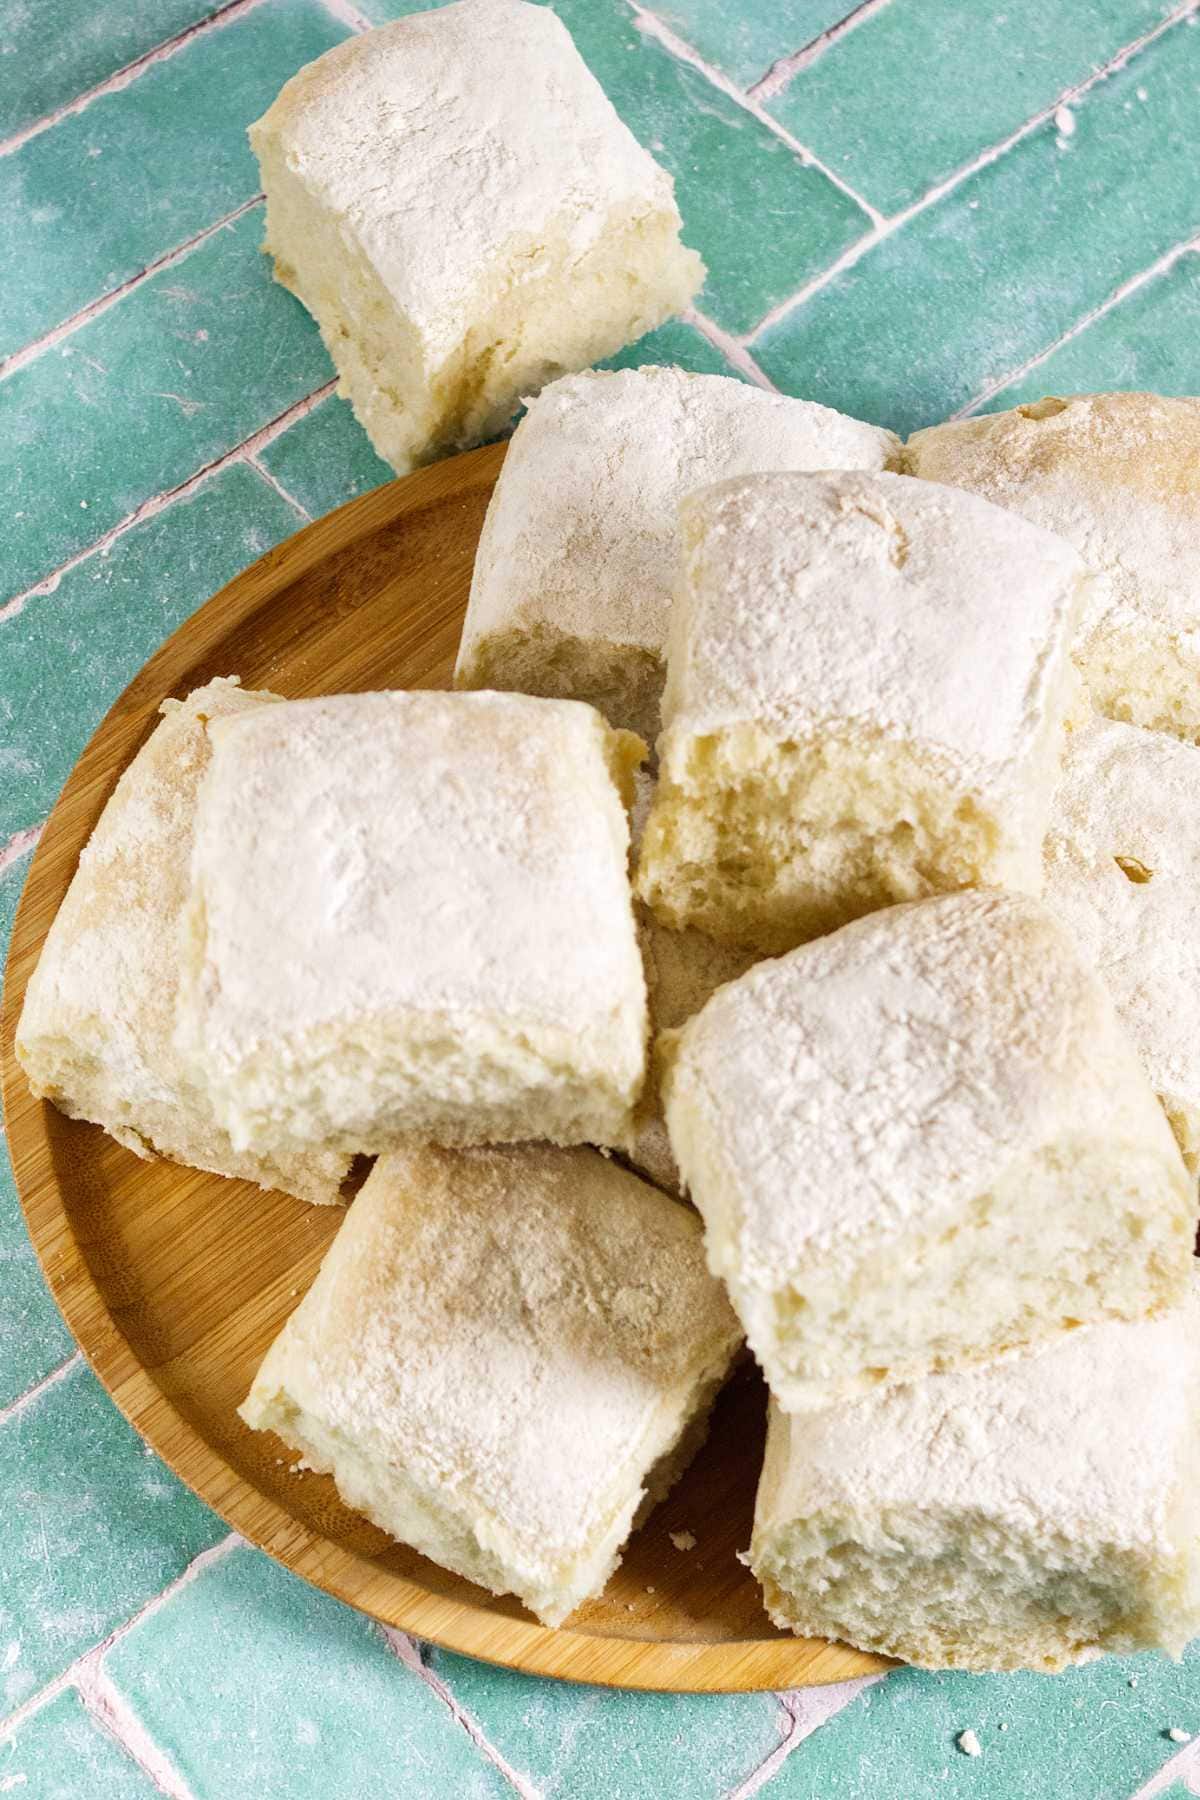
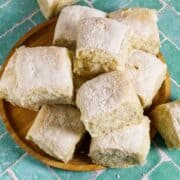
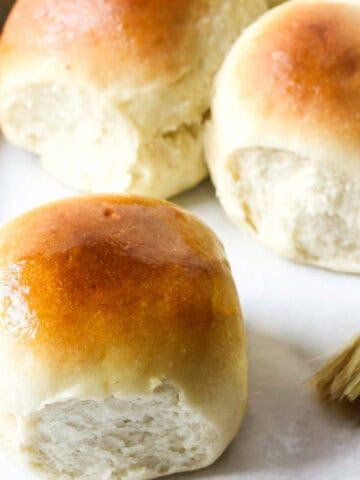
This traditional Waterford blaa recipe shows how to make the flour-dusted bread rolls from County Waterford. Baked close together with pale tops and lightly crisp bottoms, these rolls develop a soft, springy crumb that works well for sandwiches or simply spread with butter and jam.
The dough uses simple bread ingredients and rises three times to develop the characteristic structure of authentic blaas. Baking the rolls close together helps them rise upward while keeping the sides soft.
What Are Waterford Blaas?
Waterford blaas are traditional Irish bread rolls from County Waterford in southeast Ireland. They are known for their pale flour-dusted tops, soft springy crumb, and lightly crisp bottoms. The name is pronounced "blah," similar to the sound of the word "blah."
Unlike soft American dinner rolls, blaas are designed to have a slightly chewy crumb that holds up well to fillings. The rolls are baked close together so they rise upward rather than spreading outward, and the flour dusting keeps the tops pale during baking.
Many historians trace the origin of blaas to French Huguenot bakers who settled in Waterford in the 1700s. In 2013, Waterford blaas received Protected Geographical Indication status, which means only rolls produced in the Waterford region can officially carry the name.
How This Waterford Blaa Recipe Works
The simple dough and three rises develop a light, springy crumb that holds up well for heartier sandwiches. Baking the rolls close together helps them rise upward while keeping most of the sides soft.
- Triple rise structure: Allowing the dough to rise three times strengthens the gluten network and creates the soft springy crumb that makes blaas distinctive.
- Bread flour strength: The higher protein content in bread flour helps the rolls hold their shape and gives the crumb enough structure for hearty sandwich fillings.
- Close pan placement: Baking the rolls about one inch apart allows them to support each other while rising, which keeps the sides soft while the bottoms bake lightly crisp.
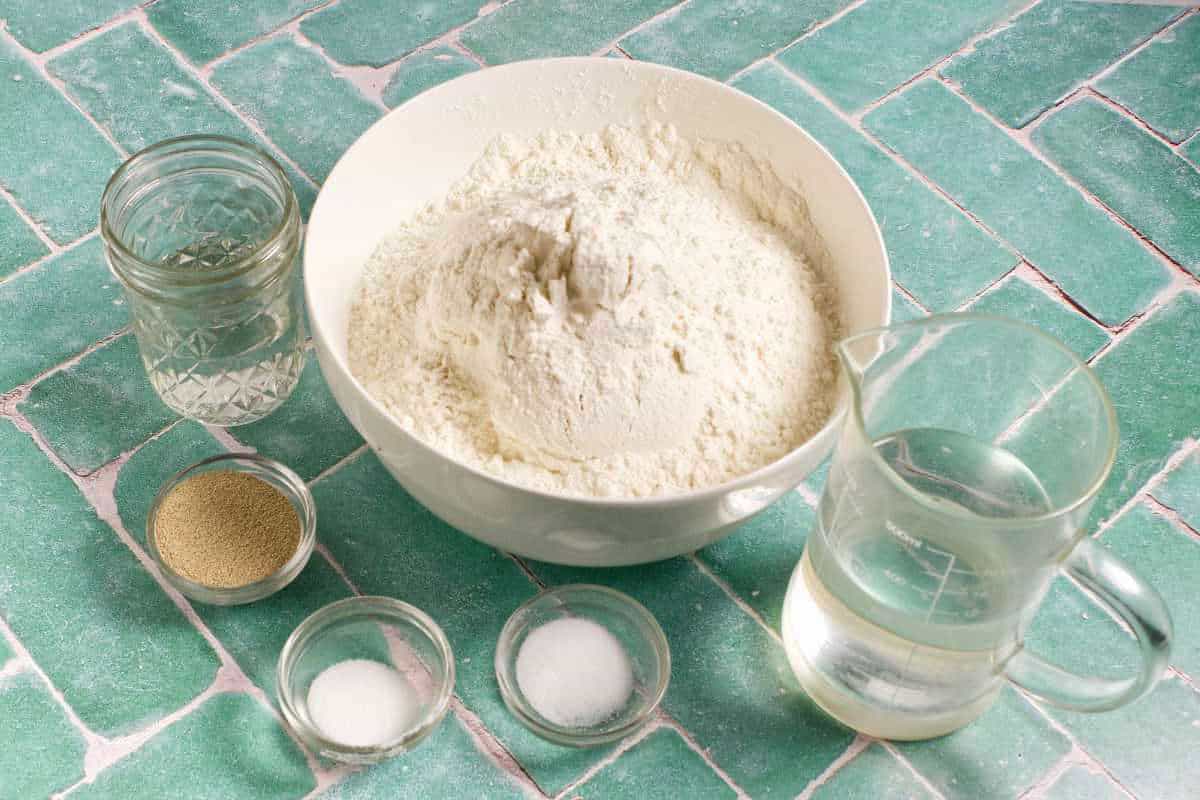
Ingredients Overview
This Waterford blaa recipe uses classic bread ingredients including bread flour, yeast, water, salt, and a small amount of sugar to activate the yeast. Bread flour provides the strength needed to support the triple rise and develop the springy texture that blaas are known for.
Before the final rise, the rolls are dusted with flour. This step helps keep the tops pale during baking and creates the traditional appearance seen in Waterford bakeries.
Full ingredient amounts and preparation instructions are in the printable recipe card at the bottom of this post.
How To Make Waterford Blaas
This dough is mixed, kneaded briefly, and allowed to rise three times to develop its light, springy texture. After shaping the rolls, they are placed close together in a pan and dusted with flour before baking.
Start checking at 20 minutes, but do not chase a golden top.
Follow the step-by-step visual guide below to see each stage of the process.
Step-by-Step Guide for Making Waterford Blaas
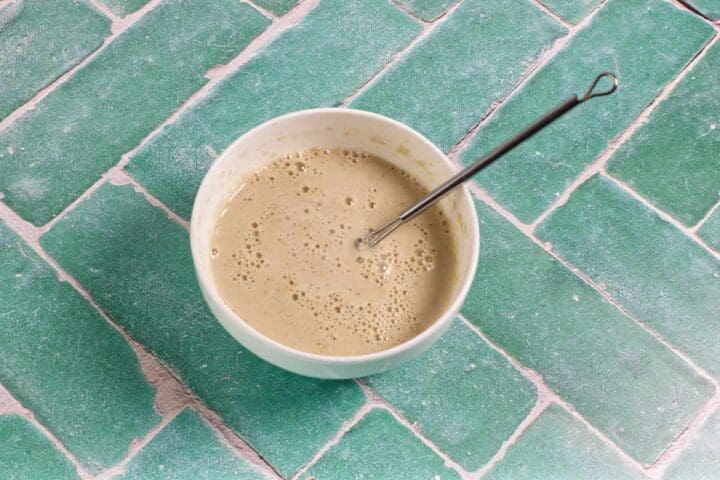
- In a small bowl or measuring cup, combine the warm water, yeast, and sugar. Stir until dissolved and let sit about 5 minutes, until foamy.
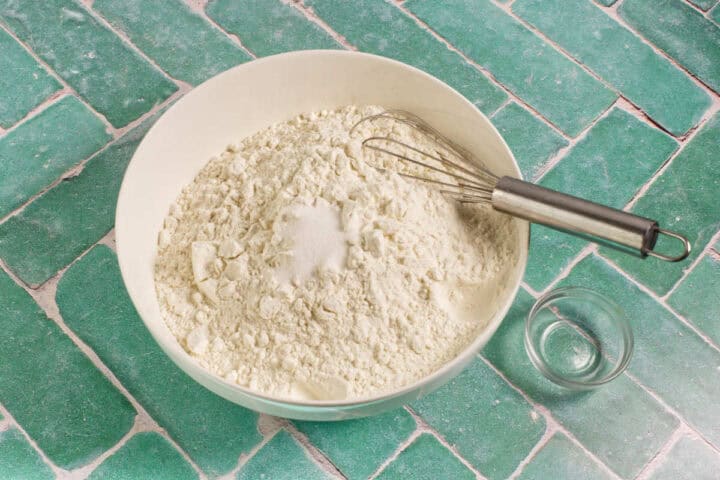
- In a large bowl, mix the flour and salt together with a whisk.
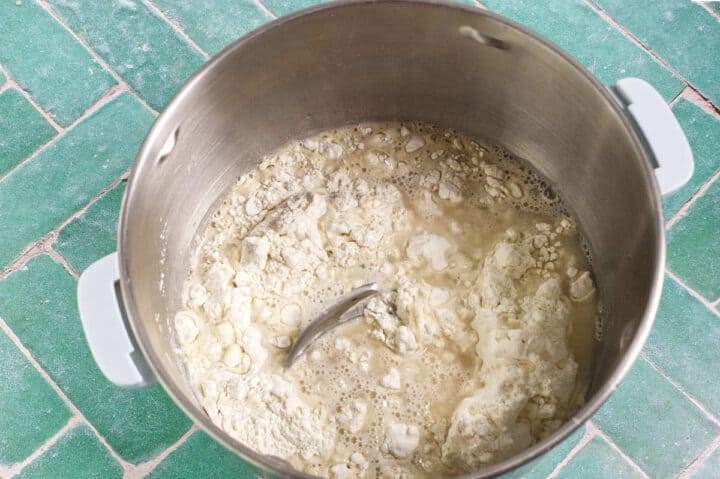
- Add the yeast mixture to the flour. Add the remaining water gradually while mixing with a wooden spoon or stand mixer fitted with a dough hook. Mix until the dough forms a soft ball and pulls away from the bottom of the bowl.
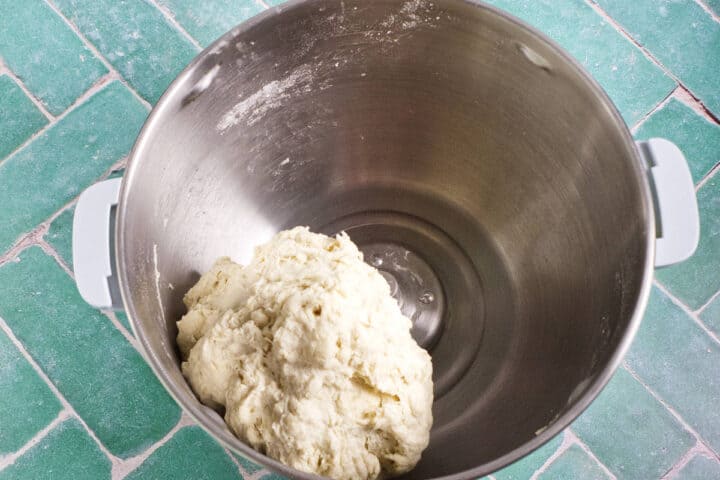
- Knead by hand or with the dough hook for about 5 minutes, until the dough is smooth and elastic.
- Place the dough in a lightly oiled bowl, cover, and let rise in a warm spot for about 1 hour.
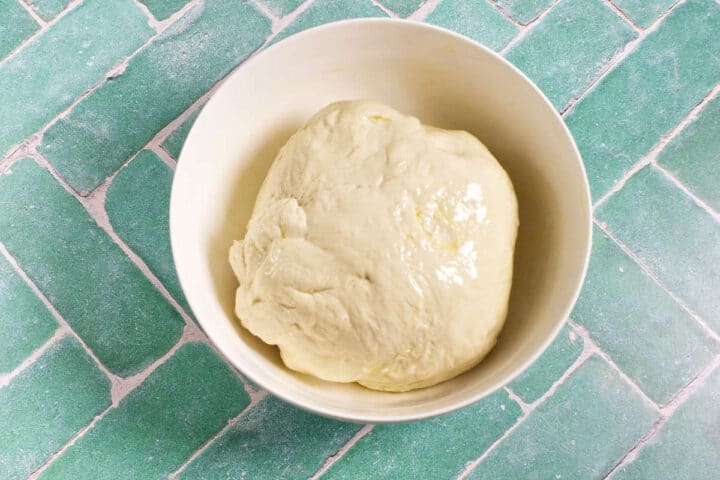
- The dough should double in size. If you press a finger into it and the indentation remains, it is ready.
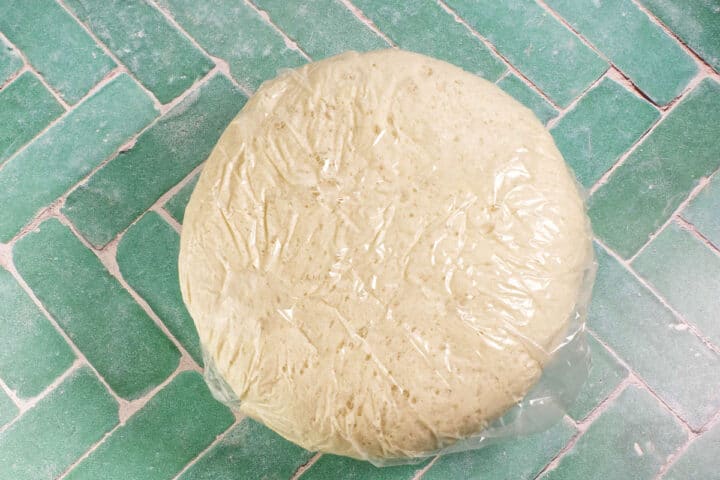
- Punch down the dough to release the air and return it to the bowl. Let rise again for about 30 minutes.
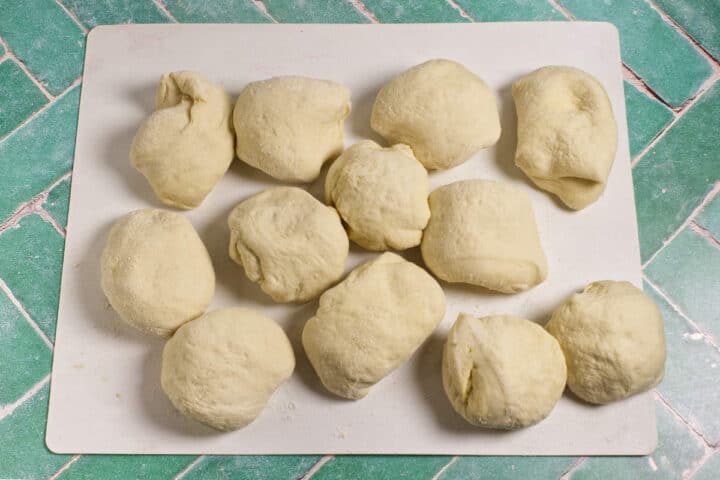
- Turn the dough onto a lightly floured surface and divide into 12 equal pieces, about 3 oz each.
Pro Tip - Do not Grease the Pan
Authentic blaas are baked in a flour-dusted pan rather than a greased one. Sprinkle the bottom of the pan liberally with flour so the rolls release easily after baking. The flour also helps create the lightly crisp bottoms that are characteristic of traditional Waterford blaas.
If the rolls stick on the sides slightly after baking, run a thin knife along the edges of the pan to release them.
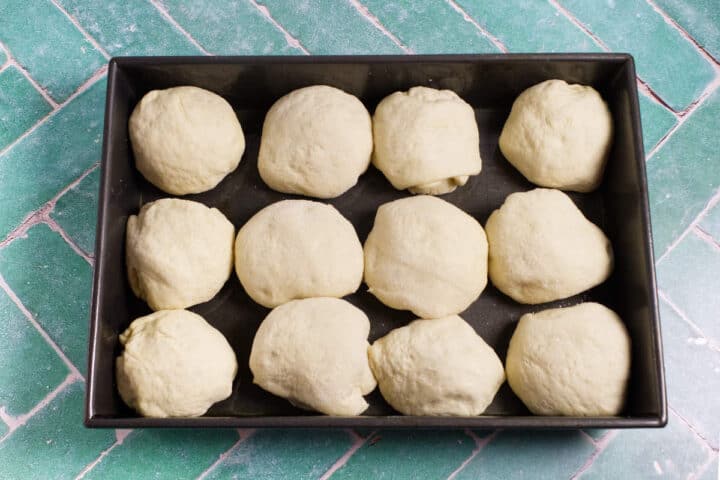
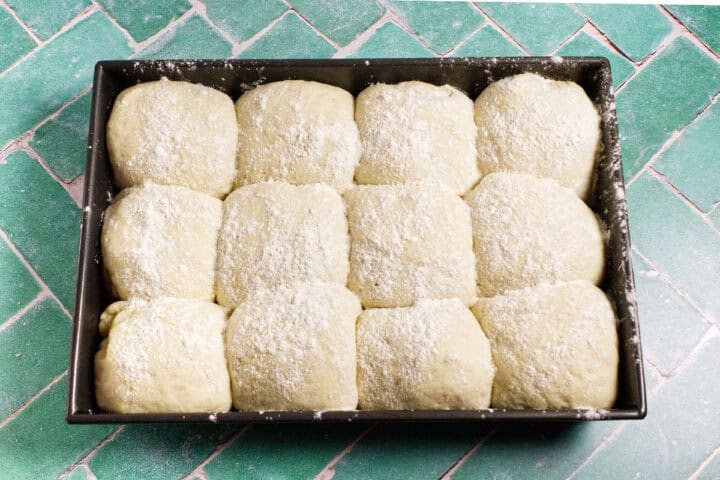
- Preheat your oven to 425℉, but do not grease the baking pan. Roll the dough into balls. Evenly sprinkle about 3 tablespoons of flour across the bottom of the baking pan before placing the rolls about 1 inch apart in a 9×13-inch pan.
- Dust the tops of the rolls lightly but evenly with 3 to 4 tablespoons of flour, then cover the pan with plastic wrap. Let the rolls rise again for 30 to 45 minutes.
Pro Tip - ⚠️ Do Not Bake Until Golden
Don't bake these rolls until the tops turn golden brown. Authentic Waterford blaas stay pale on top with only lightly crisp bottoms and sides.
If your oven browns quickly, bake on a lower rack and loosely tent with foil for the last few minutes if needed. If the tops begin browning too much, they have baked too long.
👉In my oven, 22 minutes was the sweet spot. At 28 minutes the tops browned too much, and at 20 minutes the rolls were slightly underbaked.
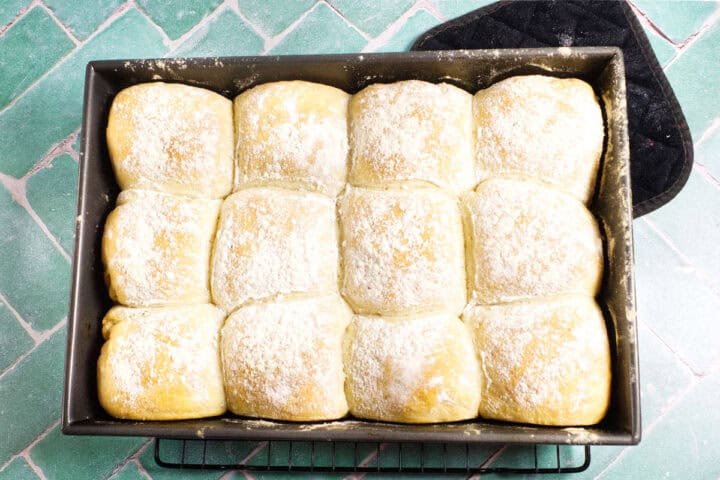
- Bake for about 22 minutes in the preheated oven, then check for doneness. The bottoms should be lightly crisp and pale golden, and the rolls should sound hollow when tapped. The tops should remain pale, not deeply browned.
Serving Suggestions
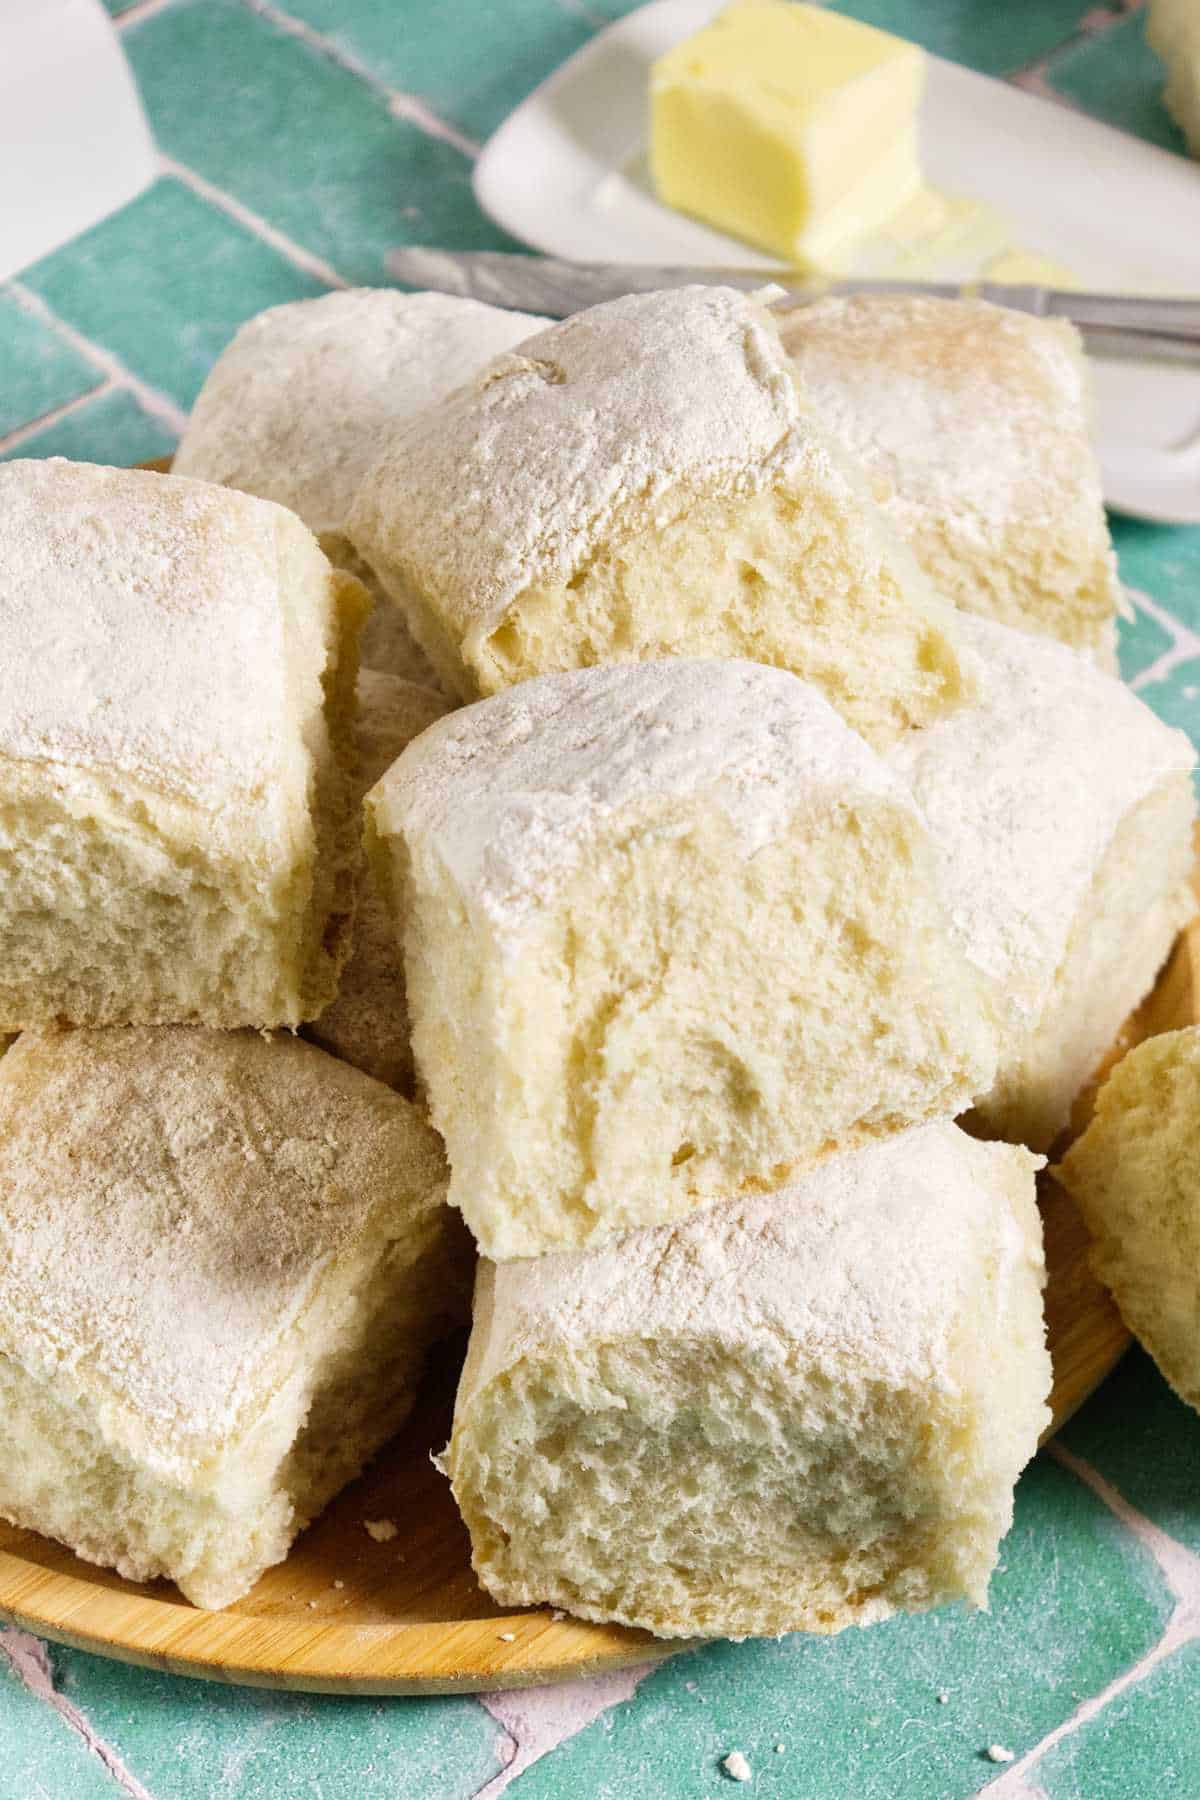
Waterford blaas are sturdy rolls that work well for sandwiches or simple bread spreads. Split a warm roll and spread it with butter, strawberry rhubarb jam, or honey. These rolls also work well for deli style sandwiches. The slightly springy crumb holds fillings without becoming soggy.
In Waterford bakeries, a classic preparation is a rasher blaa, where the warm roll is split and filled with butter and hot bacon rashers.
Substitutions and Variations
Some useful substitutions and variations when making this Waterford blaa recipe:
- All purpose flour option: If bread flour is unavailable, all purpose flour can be used. The rolls will still bake well but the crumb will be slightly softer.
- Stand mixer or hand kneading: This dough can be kneaded using a stand mixer with a dough hook or by hand on a lightly floured surface.
- Adjust the roll size: Divide the dough into 10 larger rolls for hearty sandwiches or 15 smaller rolls for lighter portions. Baking time may vary slightly.
- Alternate baking pans: If a 9×13 pan is unavailable, the rolls can be baked close together on a sheet pan or in a large cast iron skillet.
- Extra flour dusting: A heavier flour coating on top creates the classic bakery appearance of traditional Waterford blaas.
Tips for Success
Helpful tips to help you when making this Waterford blaa recipe:
- Measure flour carefully: Use the spoon and level method or weigh the flour to avoid adding too much. Excess flour makes the dough stiff.
- Use properly warm water: Water around 105 to 110°F activates the yeast without damaging it.
- Allow all three rises: Each rise contributes to the flavor and springy texture of the finished rolls.
- Bake the rolls close together: Placing the rolls about one inch apart allows them to rise upward while keeping the sides soft.
Storage Options
Here is how I store leftovers when making this recipe:
- Room temperature storage: Keep the rolls in a sealed container or bag at room temperature for up to two days.
- Freeze for longer storage: Place cooled rolls in a freezer safe bag and freeze for up to six weeks.
- Refresh before serving: Warm the rolls in a 300°F oven for several minutes to soften the crumb and restore the lightly crisp bottom.
Related Recipes
- Irish Wheaten Bread Made With American Flours
- Authentic Irish Brown Bread
- Traditional Irish Soda Bread
- Irish Soda Bread with Raisins)
- Gluten-Free Irish Soda Bread with Oat Flour
Frequently Asked Questions
The flour creates the traditional pale bakery style top and helps prevent the crust from becoming thick during baking.
Authentic blaas are baked until the bottoms are lightly crisp while the tops remain pale. The flour dusting and shorter baking time help maintain this appearance.
Placing the rolls close together allows them to support each other as they rise, which helps maintain their shape and keeps the sides soft.
Blaas have a springy, almost spongy crumb and a lightly crisp bottom rather than the soft buttery texture typical of American dinner rolls.
The triple rise strengthens the dough structure and develops the springy texture that is characteristic of traditional blaas.
The dough should double in size. When pressed gently with a finger, the indentation should remain.
Inactive yeast, incorrect water temperature, or shortening the rise times are the most common causes.
Breakfast Breads
- Irish Soda Bread with Raisins
- Blueberry Lemon Scones
- Dried Cherry Scones
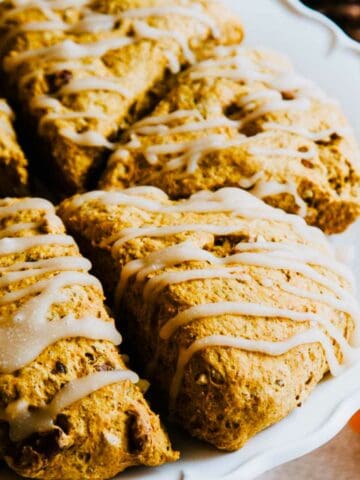
- Pumpkin Scones with Maple Glaze

Get the Recipe!
Waterford Blaas (Traditional Irish Bread Rolls)
Equipment
Ingredients
- ⅔ cup warm water 105-110°F
- 1 ½ tablespoons dry active yeast (.5oz/14g)
- 1 teaspoon sugar
- 5 ½ cups bread flour (1 ¾ lbs/780g)
- 1 teaspoon salt
- 1 ⅓ cups additional water
- cup additional flour about 3 tablespoons for pan bottom and 3 tablespoons for dusting the tops
Instructions
Activate the Yeast
- In a small bowl or measuring cup, combine the warm water, yeast, and sugar. Stir until dissolved and let sit about 5 minutes, until foamy.⅔ cup warm water, 1 ½ tablespoons dry active yeast, 1 teaspoon sugar
Make the Dough
- In a large bowl, mix the flour and salt together with a whisk.5 ½ cups bread flour, 1 teaspoon salt
- Add the yeast mixture to the flour. Add the remaining water gradually while mixing with a wooden spoon or stand mixer fitted with a dough hook. Mix until the dough forms a soft ball and pulls away from the bottom of the bowl.1 ⅓ cups additional water
- Knead by hand or with the dough hook for about 5 minutes, until the dough is smooth and elastic.
First Rise
- Place the dough in a lightly oiled bowl, cover, and let rise in a warm spot for about 1 hour.
- The dough should double in size. If you press a finger into it and the indentation remains, it is ready.
Second Rise
- Punch down the dough to release the air and return it to the bowl. Let rise again for about 30 minutes.
Shape the Rolls
- Turn the dough onto a lightly floured surface and divide into 12 equal pieces, about 90 g (3 oz) each.
- Preheat your oven to 425℉, but do not grease the baking pan. Roll the dough into smooth balls. Evenly sprinkle about 3 tablespoons flour across the bottom of the baking pan before placing the rolls about 1 inch apart in a 9×13-inch pan.cup additional flour
Final Rise
- Dust the tops of the rolls lightly but evenly with about 3 - 4 tablespoons of flour, then cover the pan with plastic wrap. Let the rolls rise again for 30 to 45 minutes.
Bake
- Bake in a preheated 425°F oven for 20-22 minutes. The bottoms should be crisp while the tops remain pale.
Notes
- Measure flour carefully: Use the spoon and level method or weigh the flour to avoid adding too much. Excess flour makes the dough stiff.
- Use properly warm water: Water around 105 to 110°F activates the yeast without damaging it.
- Allow all three rises: Each rise contributes to the flavor and springy texture of the finished rolls.
- Bake the rolls close together: Placing the rolls about one inch apart allows them to rise upward while keeping the sides soft.
Nutrition
Pin It For Later ⤵
Kelly says
Easy to follow and turned out great!